
You can authenticate a phone number by delivering a one-time password (OTP) via a phone call. To do this, you call the number and read a sequence of digits to the recipient via text-to-speech. To verify the number, the user needs to confirm the digits by entering them using the phone’s keypad.
Developers commonly use voice OTP to verify new user registrations, online transactions, and login sessions in an app or website. In this blog post, we walk you through a sample implementation of sending a voice OTP using the Plivo's Voice API and PHLO, our visual workflow builder. Plivo’s direct carrier connectivity and intelligent routing engine guarantee the best call connectivity and quality.
Prerequisites
Before you get started, you’ll need:
- A Plivo account - sign up for one for free if you don’t have one already.
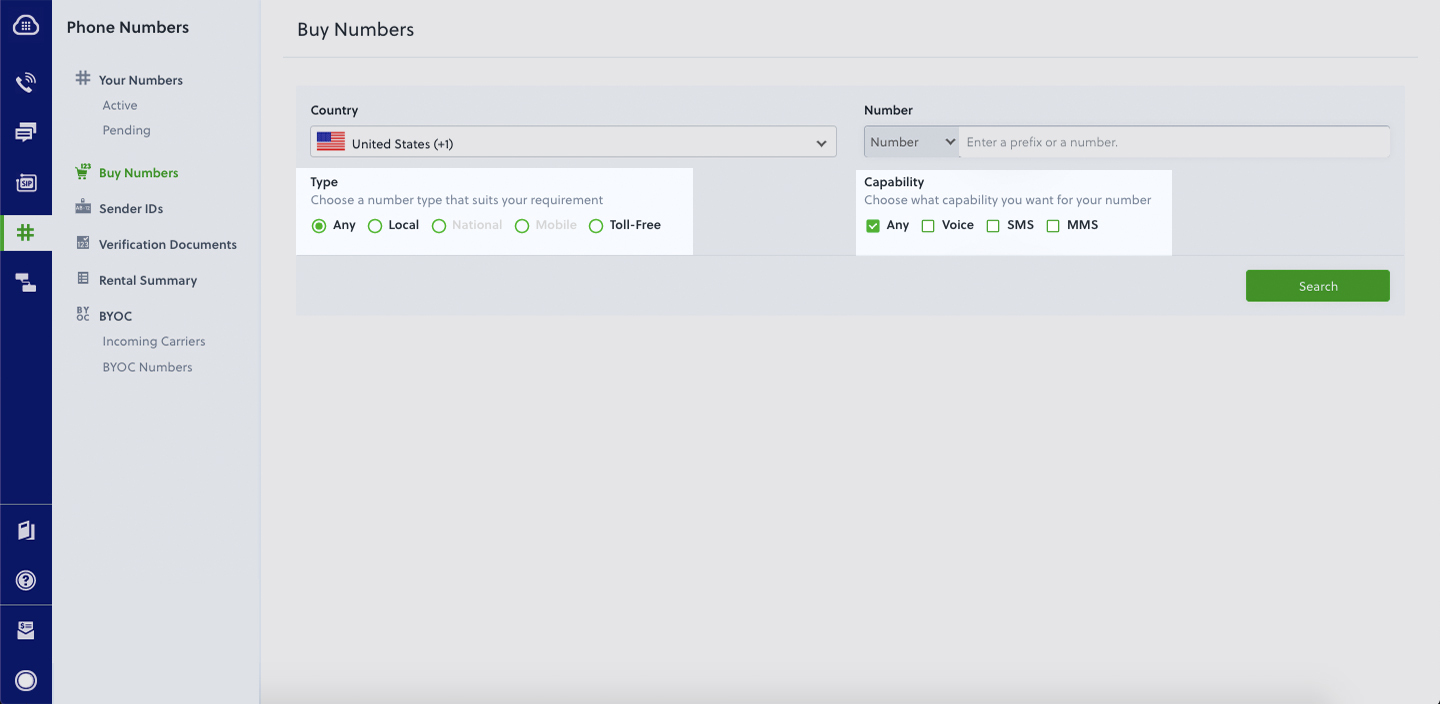
- A voice-enabled Plivo phone number if you want to receive incoming calls. To search for and buy a number, go to Phone Numbers > Buy Numbers on the Plivo console.
- ngrok - a utility that exposes your local development server to the internet over secure tunnels.
Create a PHLO to send OTP via phone call
PHLO lets you construct your entire use case and build and deploy workflows visually. With PHLO, you pay only for calls you make and receive, and building with PHLO is free.
To get started, visit PHLO in the Plivo console and click on Create New PHLO to build a new PHLO. On the Choose your use case window, click Build my own. The PHLO canvas will appear with the Start node. Click on the Start Node, and under API request, fill in the Keys as from, to, and otp, then click Validate. From the list of components on the left-hand side, drag and drop the Initial Call component onto the canvas and connect the Start node with the Initiate Call node using the API Request trigger state.
Configure the Initiate Call node with the using the From field and in the To field. Once you’ve configured a node, click Validate to save the configurations. Similarly, create a node for the Play Audio component and connect it to the Initiate Call node using the Answered trigger state. Next, configure the Play Audio node to play a specific message to the user - in this case, “Your verification code is <otp>.” Under Speak Text, click on Amazon Polly and paste the following:
.highlight pre{ background-color: rgb(33, 33, 48); border-radius: 0; padding: 15px 18px 15px 18px; } pre.lineno{ color: #fff; opacity: .3; } .w-richtext figure { max-width: 100%; position: relative; }
<Speak voice="Polly.Amy">
   <prosody rate="medium">
      Your verification code is
      <break/>
      <break/>
      <say-as interpret-as="spell-out">{{Start.http.params.otp}}</say-as>
   </prosody>
</Speak>
Click Validate to save.
Connect the Initiate Call node with the Play Audio node using the Answered trigger state. After you complete the configuration, provide a friendly name for your PHLO and click Save.
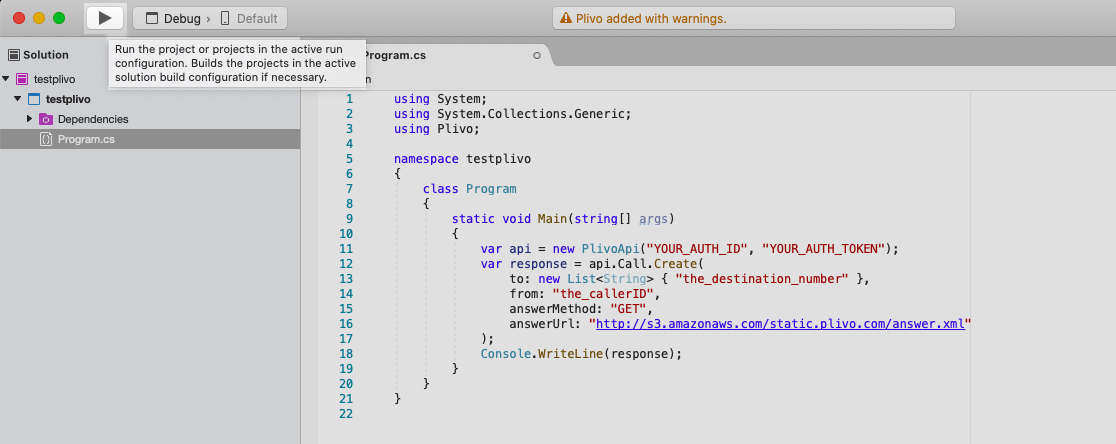
Set up a .NET Framework app
In this section, we’ll walk you through how to set up a .NET Framework app in under five minutes and start handling voice OTP.
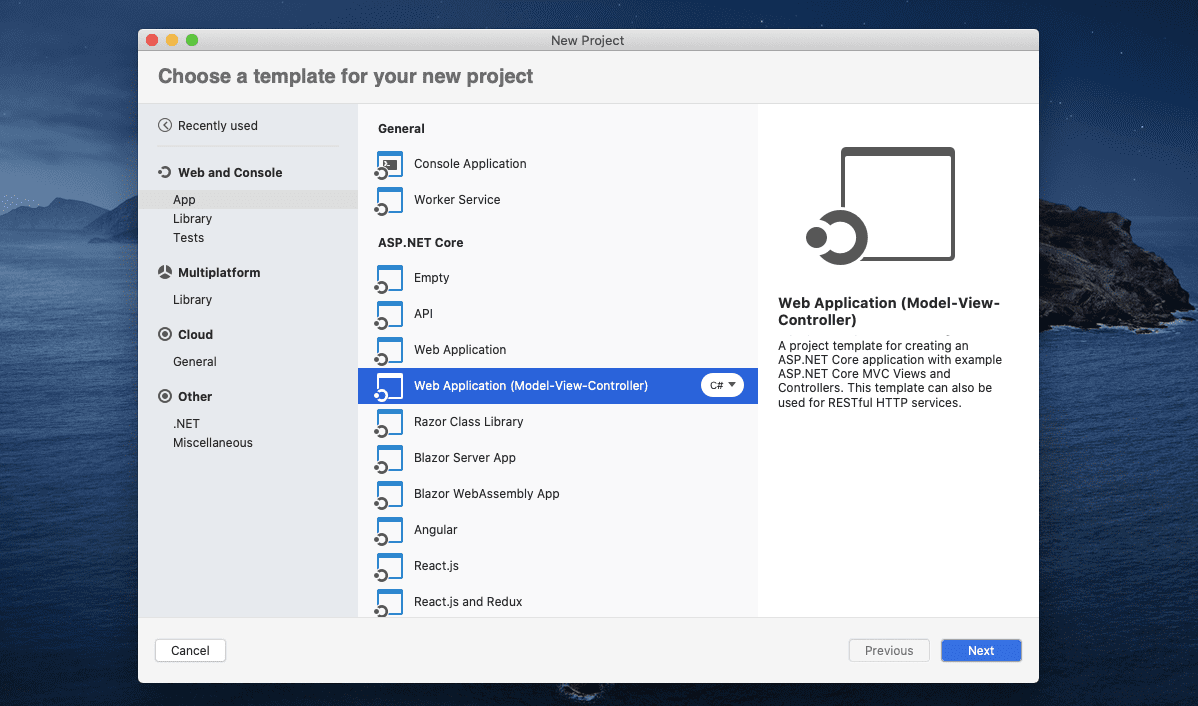
- Create an MVC web app.
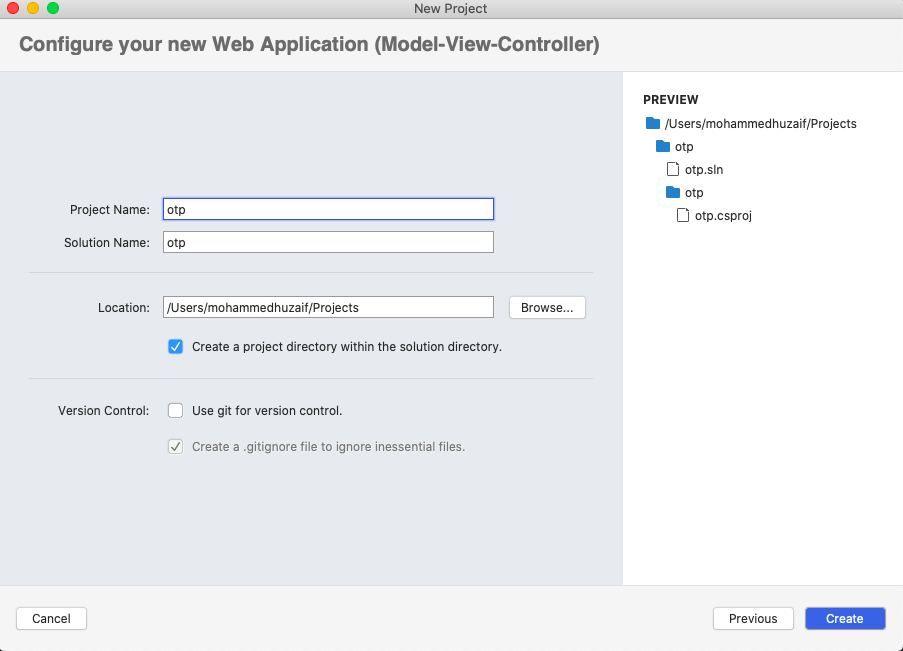
- Configure the MVC app and provide a project name.
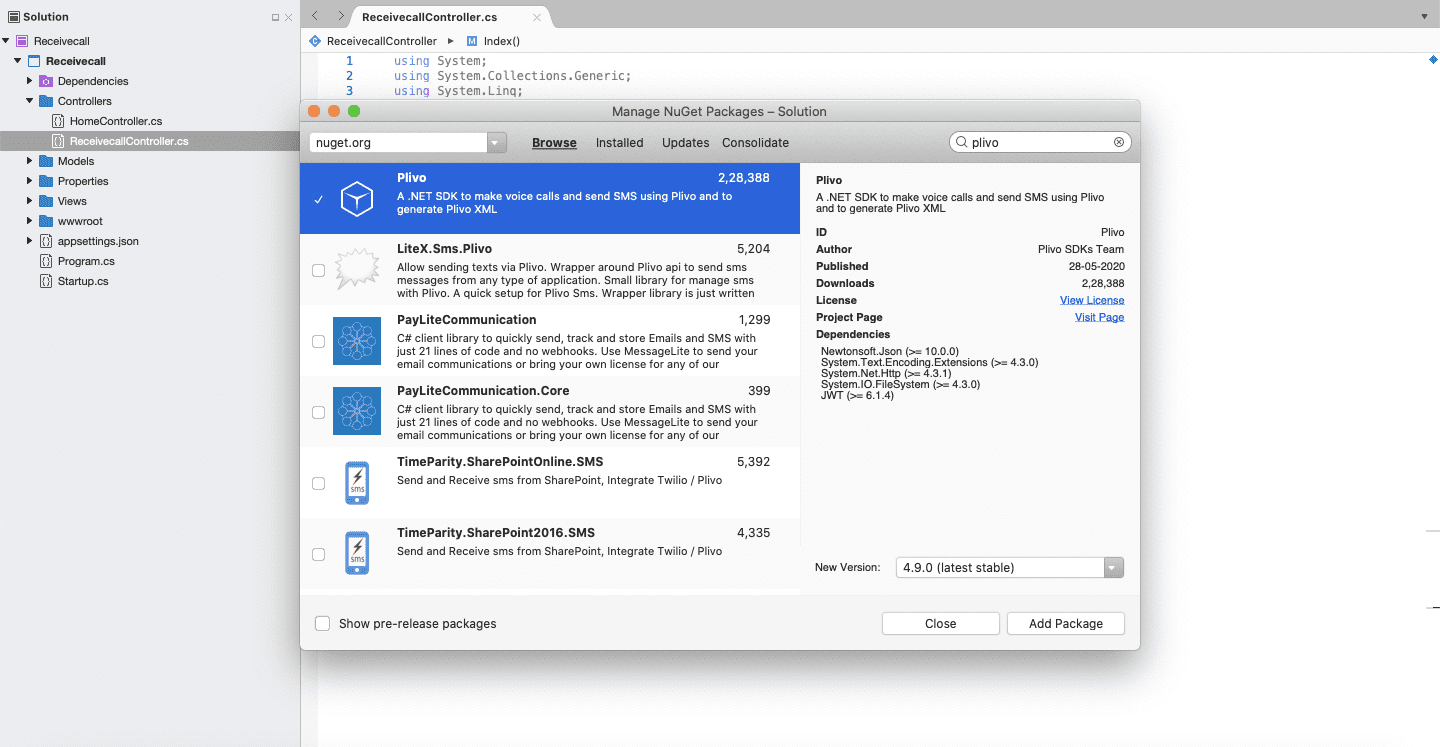
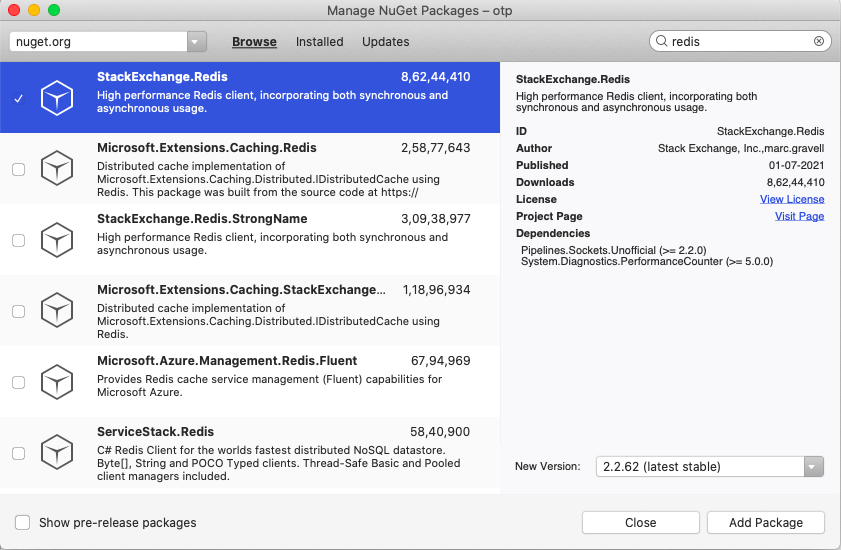
- Install the Plivo NuGet package.
- Install the Redis NuGet package.
Trigger the PHLO
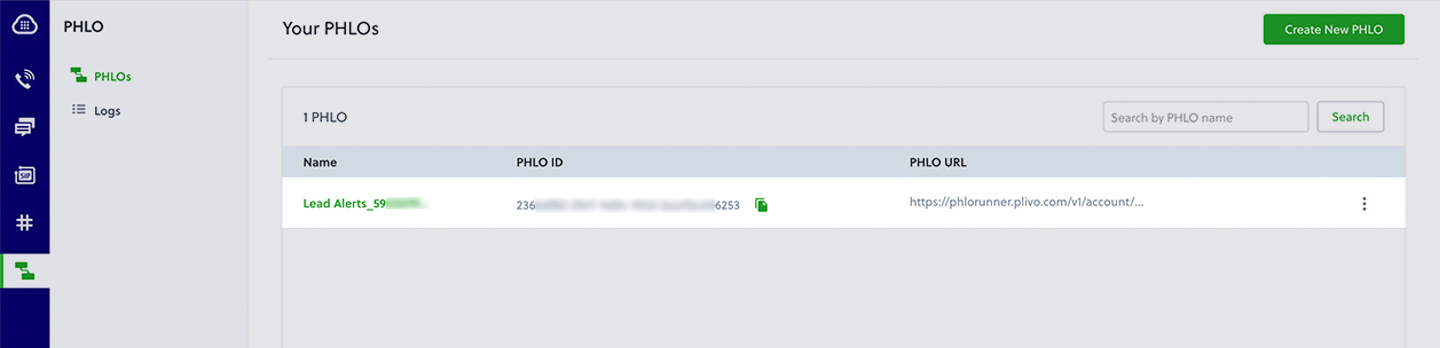
Once you’ve created and set up your .NET dev envrironment, go to the Plivo consolse and copy the PHLO_ID. You can integrate a PHLO into your application workflow by making an API request to trigger the PHLO with the required payload.
Navigate to the Controllers directory, create a Controller named otp.cs, and paste into it this code.
    1   using System ;
    2   using System.Collections.Generic ;
    3   using Plivo ;
    4   using StackExchange.Redis ;
    5   using Microsoft.AspNetCore.Mvc ;
    6   using Newtonsoft.Json ;
    7
    8   namespace otp.Controllers  {
    9    public  class otp : Controller  {
    10   public  object dispatch_otp  String destination_number )  {
    11    ConnectionMultiplexer redis  = ConnectionMultiplexer .Connect ("localhost: 6379" );
    12    IDatabase conn  = redis .GetDatabase ();
    13
    14    Random r  =  new Random ();
    15    var code  = r .Next ( 999999 );
    16    var phloClient  =  new PhloApi ("<auth_id>" , "<auth_token>" );
    17    var phloID  = "phlo_id" ;
    18    var phlo  = phloClient  Phlo .Get  phloID );
    19    var data  =  new Dictionary < string ,  object >
    20     {
    21      { "from" , "+15671234567"  },
    22      { "to" , destination_number  },
    23      { "otp" , code  },
    24     };
    25     Console .WriteLine  phlo .Run  data ));
    26     var key  =  string .Format ("number:{0}:code" , destination_number );
    27     conn .StringSet  key , code , TimeSpan .FromSeconds ( 60 ));
    28
    29     Verification verification  =  new Verification ();
    30     verification  status  = "success" ;
    31     verification  message  = "verification initiated" ;
    32     string output  = JsonConvert .SerializeObject  verification );
    33     return output ;
    34     }
    35
    36     public string verify_otp(String destination_number, String otp) {
    37     ConnectionMultiplexer redis = ConnectionMultiplexer.Connect("localhost: 6379");
    38     IDatabase conn = redis.GetDatabase();
    39
    40      string key = $ "number:{destination_number}:code";
    41      var compare_code = (string) conn.StringGet(key);
    42
    43       if (compare_code == otp) {
    44       conn.KeyDelete(key);
    45       Verification verification = new Verification();
    46       verification.status = "success";
    47       verification.message = "Number verified";
    48       string output = JsonConvert.SerializeObject(verification);
    49       return output;
    50        } else if (compare_code != otp) {
    51        Verification verification = new Verification();
    52        verification.status = "failure";
    53        verification.message = "Number not verified";
    54        string output = JsonConvert.SerializeObject(verification);
    55        return output;
    56        } else {
    57        Verification verification = new Verification();
    58        verification.status = "failure";
    59        verification.message = "number not found!";
    60        string output = JsonConvert.SerializeObject(verification);
    61        return output;
    62        }
    63
    64      }
    65
    66     private class Verification {
    67        public string status {
    68          get;
    69          internal set;
    70          }
    71           public string message {
    72             get;
    73           internal set;
    74           }
    75          }
    76        }
    77     }
You can get your Auth ID and Auth Token from the console.

You can find the PHLO_ID on the PHLO Listing page.
Test
Once you have created the Voice OTP app, save the file and run it.
Start Redis.
$ redis-server
$ redis-server
And you should see your basic server application in action.
https://localhost:5001/dispatch_otp/?destination_number=<destination_number>
https://localhost:5001/verify_otp/?destination_number=<destination_number>&otp=<otp>
Boom - you’ve made an outbound call with the OTP as a text-to-speech message.
Simple and reliable
And that’s all there is to send OTP via a phone call using Plivo’s Ruby SDK. Our simple APIs work in tandem with our comprehensive global network. You can also use Plivo’s premium direct routes that guarantee the highest possible delivery rates and the shortest possible delivery times for your 2FA SMS and voice messages. See for yourself - sign up for a free trial account.


