Documentation Index
Fetch the complete documentation index at: https://plivo.com/docs/llms.txt
Use this file to discover all available pages before exploring further.
This guide shows how to receive MMS messages on a Plivo phone number. You can do this using Plivo’s APIs.
Here’s how to use Plivo APIs to receive MMS multimedia messages.How it works
When someone sends an MMS to your Plivo number, Plivo forwards the message details, including the media URL, to a web server you control. Your server can then process this information.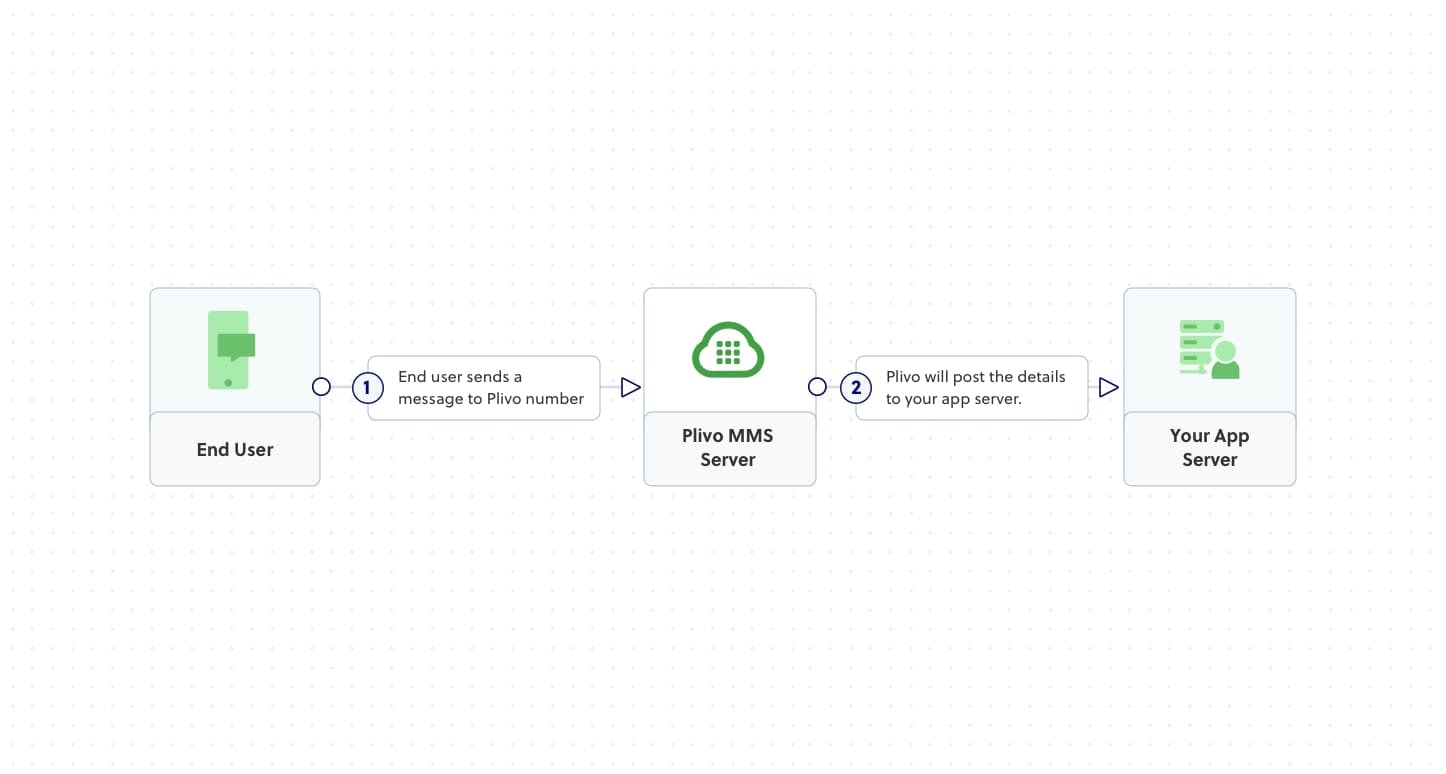
Prerequisites
To get started, you need a Plivo account — sign up if you don’t have one. You must also have a Plivo phone number that supports MMS. You can rent one from the Numbers page in the console or by using the Numbers API.
1. Create a server to receive MMS messages
First, create a web server that can receive POST requests from Plivo. The code below shows how to start a basic server that logs the From and To numbers, the Text body, and the Media0 URL from an incoming MMS.Select your programming language to see the specific code. Node.js
Ruby
Python
PHP
.NET
Java
Go
If this is your first time using Plivo APIs with Node.js, follow our instructions to set up your development environment.Create a file called receive_mms.js and paste this code into it.const express = require('express');
const bodyParser = require('body-parser');
const app = express();
app.use(bodyParser.urlencoded({ extended: true }));
app.all('/receive_mms/', (request, response) => {
const from_number = request.body.From;
const to_number = request.body.To;
const text = request.body.Text;
const media_url = request.body.Media0;
console.log('Message received - From: %s, To: %s, Text: %s, Media: %s', from_number, to_number, text, media_url);
response.status(200).send('Message received');
});
app.listen(3000, () => {
console.log('Server is running on port 3000');
});
If this is your first time using Plivo APIs with Ruby, follow our instructions to set up your development environment.Create a Rails controller for inbound messages.$ rails generate controller Plivo receive_mms
app/controllers/plivo_controller.rb and paste in this code.class PlivoController < ApplicationController
def receive_mms
from_number = params[:From]
to_number = params[:To]
text = params[:Text]
media_url = params[:Media0]
puts "Message received - From: #{from_number}, To: #{to_number}, Text: #{text}, Media: #{media_url}"
head :ok
end
end
If this is your first time using Plivo APIs with Python, follow our instructions to set up your development environment.Create a file called receive_mms.py and paste this code into it.from flask import Flask, request
app = Flask(__name__)
@app.route('/receive_mms/', methods=['GET', 'POST'])
def inbound_mms():
from_number = request.values.get('From')
to_number = request.values.get('To')
text = request.values.get('Text')
media_url = request.values.get('Media0')
print(f'Message received - From: {from_number}, To: {to_number}, Text: {text}, Media: {media_url}')
return 'Message Received'
if __name__ == '__main__':
app.run(host='0.0.0.0', port=3000)
If this is your first time using Plivo APIs with PHP, follow our instructions to set up your development environment.Create a Laravel controller.$ php artisan make:controller MMSController
app/Http/Controllers/MMSController.php and paste in this code.<?php
namespace App\Http\Controllers;
use Illuminate\Http\Request;
use Illuminate\Http\Response;
class MMSController extends Controller
{
public function receiveMms(Request $request)
{
$from_number = $request->input('From');
$to_number = $request->input('To');
$text = $request->input('Text');
$media_url = $request->input('Media0');
error_log("Message received - From: $from_number, To: $to_number, Text: $text, Media: $media_url");
return new Response('Message received', 200);
}
}
If this is your first time using Plivo APIs with .NET, follow our instructions to set up your development environment.Create a new ASP.NET Core controller named ReceiveMmsController.cs.using System;
using Microsoft.AspNetCore.Mvc;
namespace ReceiveMms.Controllers
{
[ApiController]
public class ReceiveMmsController : ControllerBase
{
[HttpPost]
[Route("/receive_mms/")]
public IActionResult Index()
{
string from_number = Request.Form["From"];
string to_number = Request.Form["To"];
string text = Request.Form["Text"];
string media_url = Request.Form["Media0"];
Console.WriteLine($"Message received - From: {from_number}, To: {to_number}, Text: {text}, Media: {media_url}");
return Ok("Message received");
}
}
}
If this is your first time using Plivo APIs with Java, follow our instructions to set up your development environment.Create a new Spring Boot application and add this controller class.package com.example.Plivo.MMS;
import org.springframework.boot.SpringApplication;
import org.springframework.boot.autoconfigure.SpringBootApplication;
import org.springframework.web.bind.annotation.PostMapping;
import org.springframework.web.bind.annotation.RequestParam;
import org.springframework.web.bind.annotation.RestController;
@RestController
@SpringBootApplication
public class ReceiveMmsApplication {
public static void main(String[] args) {
SpringApplication.run(ReceiveMmsApplication.class, args);
}
@PostMapping(value = "/receive_mms/")
public String receiveMms(
@RequestParam("From") String from,
@RequestParam("To") String to,
@RequestParam("Text") String text,
@RequestParam(value="Media0", required=false) String mediaUrl
) {
System.out.println("Message received - From: " + from + ", To: " + to + ", Text: " + text + ", Media: " + mediaUrl);
return "Message received";
}
}
If this is your first time using Plivo APIs with Go, follow our instructions to set up your development environment.Create a file called receive_mms.go and paste this code into it.package main
import (
"fmt"
"net/http"
)
func receiveMmsHandler(w http.ResponseWriter, r *http.Request) {
fromNumber := r.FormValue("From")
toNumber := r.FormValue("To")
text := r.FormValue("Text")
mediaUrl := r.FormValue("Media0")
fmt.Println("Message Received - From:", fromNumber, ", To:", toNumber, ", Text:", text, ", Media:", mediaUrl)
w.WriteHeader(http.StatusOK)
}
func main() {
http.HandleFunc("/receive_mms/", receiveMmsHandler)
fmt.Println("Server listening on port 8080...")
http.ListenAndServe(":8080", nil)
}
2. Expose your local server to the internet
Once your server is running, make it accessible from the public internet so Plivo can send requests to it. We recommend using a tunneling service like ngrok for development.$ ngrok http 3000
# The port number should match the port your server is running on
https://<unique-id>.ngrok-free.app) that forwards traffic to your local server.
3. Create a Plivo application
A Plivo application tells Plivo how to handle events like incoming messages.
-
Navigate to Messaging > Applications in the Plivo console and click Add New Application.
-
Give the application a name, like
Receive MMS App.
-
Enter your server’s public URL into the
Message URL field (e.g., https://<unique-id>.ngrok-free.app/receive_mms/) and set the method to POST.
-
Click Create Application.

4. Assign a Plivo number to your application
To start receiving messages, you must assign a Plivo phone number to the application.
-
Go to the Numbers page and select the number you want to use.
-
In the Application Type drop-down, select
XML Application.
-
From the Plivo Application drop-down, select
Receive MMS App.
-
Click Update Number.

5. Test it out
Send an MMS message from your mobile phone to the Plivo number you assigned to the application. Your local server’s console should print a log with the message details.