
Overview

This guide shows how to create and configure conference calls with a PIN to let multiple people securely connect to a single call. Only participants who have a specified passcode can enter the conference call. You can make conference calls either by using our PHLO visual workflow builder or our APIs and XML documents. Follow the instructions in one of the tabs below.
Here’s how to receive a call on a Plivo number and add the caller to a conference call named “demo” after the caller enters a valid PIN.
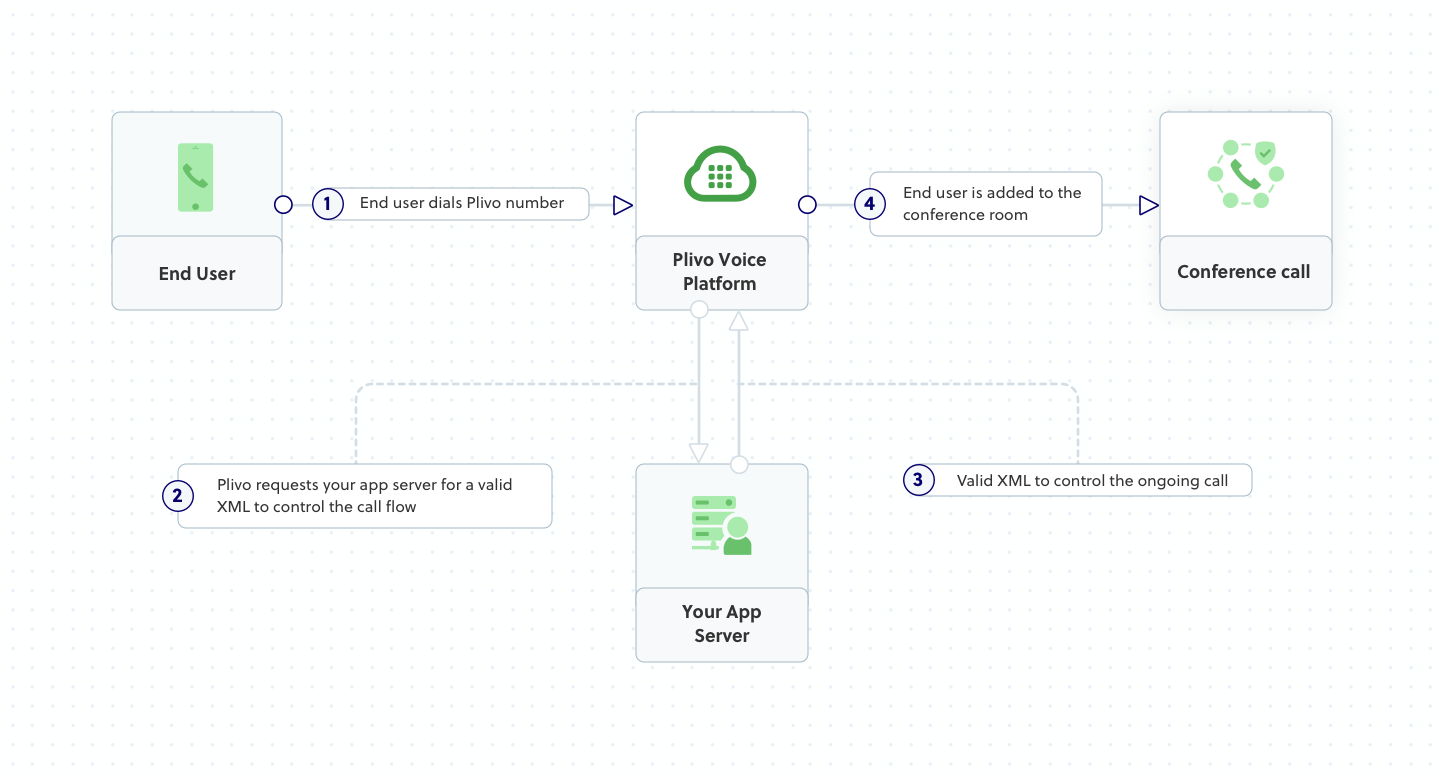
How it works

Prerequisites

To get started, you need a Plivo account — sign up with your work email address if you don’t have one already. You must have a voice-enabled Plivo phone number to receive incoming calls; you can rent numbers from the Numbers page of the Plivo console, or by using the Numbers API. If this is your first time using Plivo APIs, follow our instructions to set up a .NET development environment and a web server and safely expose that server to the internet.

Create an MVC controller to implement a conference call with PIN

In Visual Studio, create a controller called ConferencecallController.cs and paste into it this code.
using System;
using System.Collections.Generic;
using System.Diagnostics;
using Microsoft.AspNetCore.Mvc;
using Plivo.XML;

namespace Receivecall
{
    public class ConferencecallController : Controller
    {
        // Message that Plivo reads when the caller dials in
        String WelcomeMessage = "Welcome to the demo. Press 1234 to join the conference";
        // Message that Plivo reads when the caller does nothing
        String NoinputMessage = "Sorry, I didn't catch that. Please hang up and try again";
        // Message that Plivo reads when the caller enters an invalid number
        String WronginputMessage = "Sorry, that's an invalid PIN";

        // GET: /<controller>/
        public IActionResult Index()
        {
            var resp = new Response();
            Plivo.XML.GetInput get_input = new
                Plivo.XML.GetInput("",
                    new Dictionary<string, string>()
                    {
                        {"action", "https://<yourdomain>.com/conference/firstbranch/"},
                        {"method", "POST"},
                        {"digitEndTimeout", "5"},
                        {"numDigits", "4"},
                        {"inputType", "dtmf"},
                        {"redirect", "true"},
                    });
            resp.Add(get_input);
            get_input.AddSpeak(WelcomeMessage,
                new Dictionary<string, string>() { });
            resp.AddSpeak(NoinputMessage,
                new Dictionary<string, string>() { });
    
            var output = resp.ToString();
            return this.Content(output, "text/xml");
        }
        // Conference Branch
        public IActionResult FirstBranch()
        {
            String digit = Request.Query["Digits"];
            Debug.WriteLine("Digit pressed : {0}", digit);
    
            var resp = new Response();
    
            if (digit == "1234")
            {
                // Add Conference XML Tag
                resp.AddConference("demo",
                new Dictionary<string, string>()
                {
                    {"startConferenceOnEnter", "true"},
                    {"endConferenceOnExit", "true"},
                    {"waitSound", "https://<yourdomain>.com/waitmusic/"}
                });
            }
            else
            {
                // Add Speak XML Tag
                resp.AddSpeak(WronginputMessage,
                    new Dictionary<string, string>() { });
            }
    
            Debug.WriteLine(resp.ToString());
    
            var output = resp.ToString();
            return this.Content(output, "text/xml");
        }
    }
}
Before you start the application, update Properties/launchSettings.json:“applicationUrl”: “http://localhost:5000/Run the project and you should see your basic server application in action at http://localhost:5000/conference/.

Create a Plivo application for the conference call

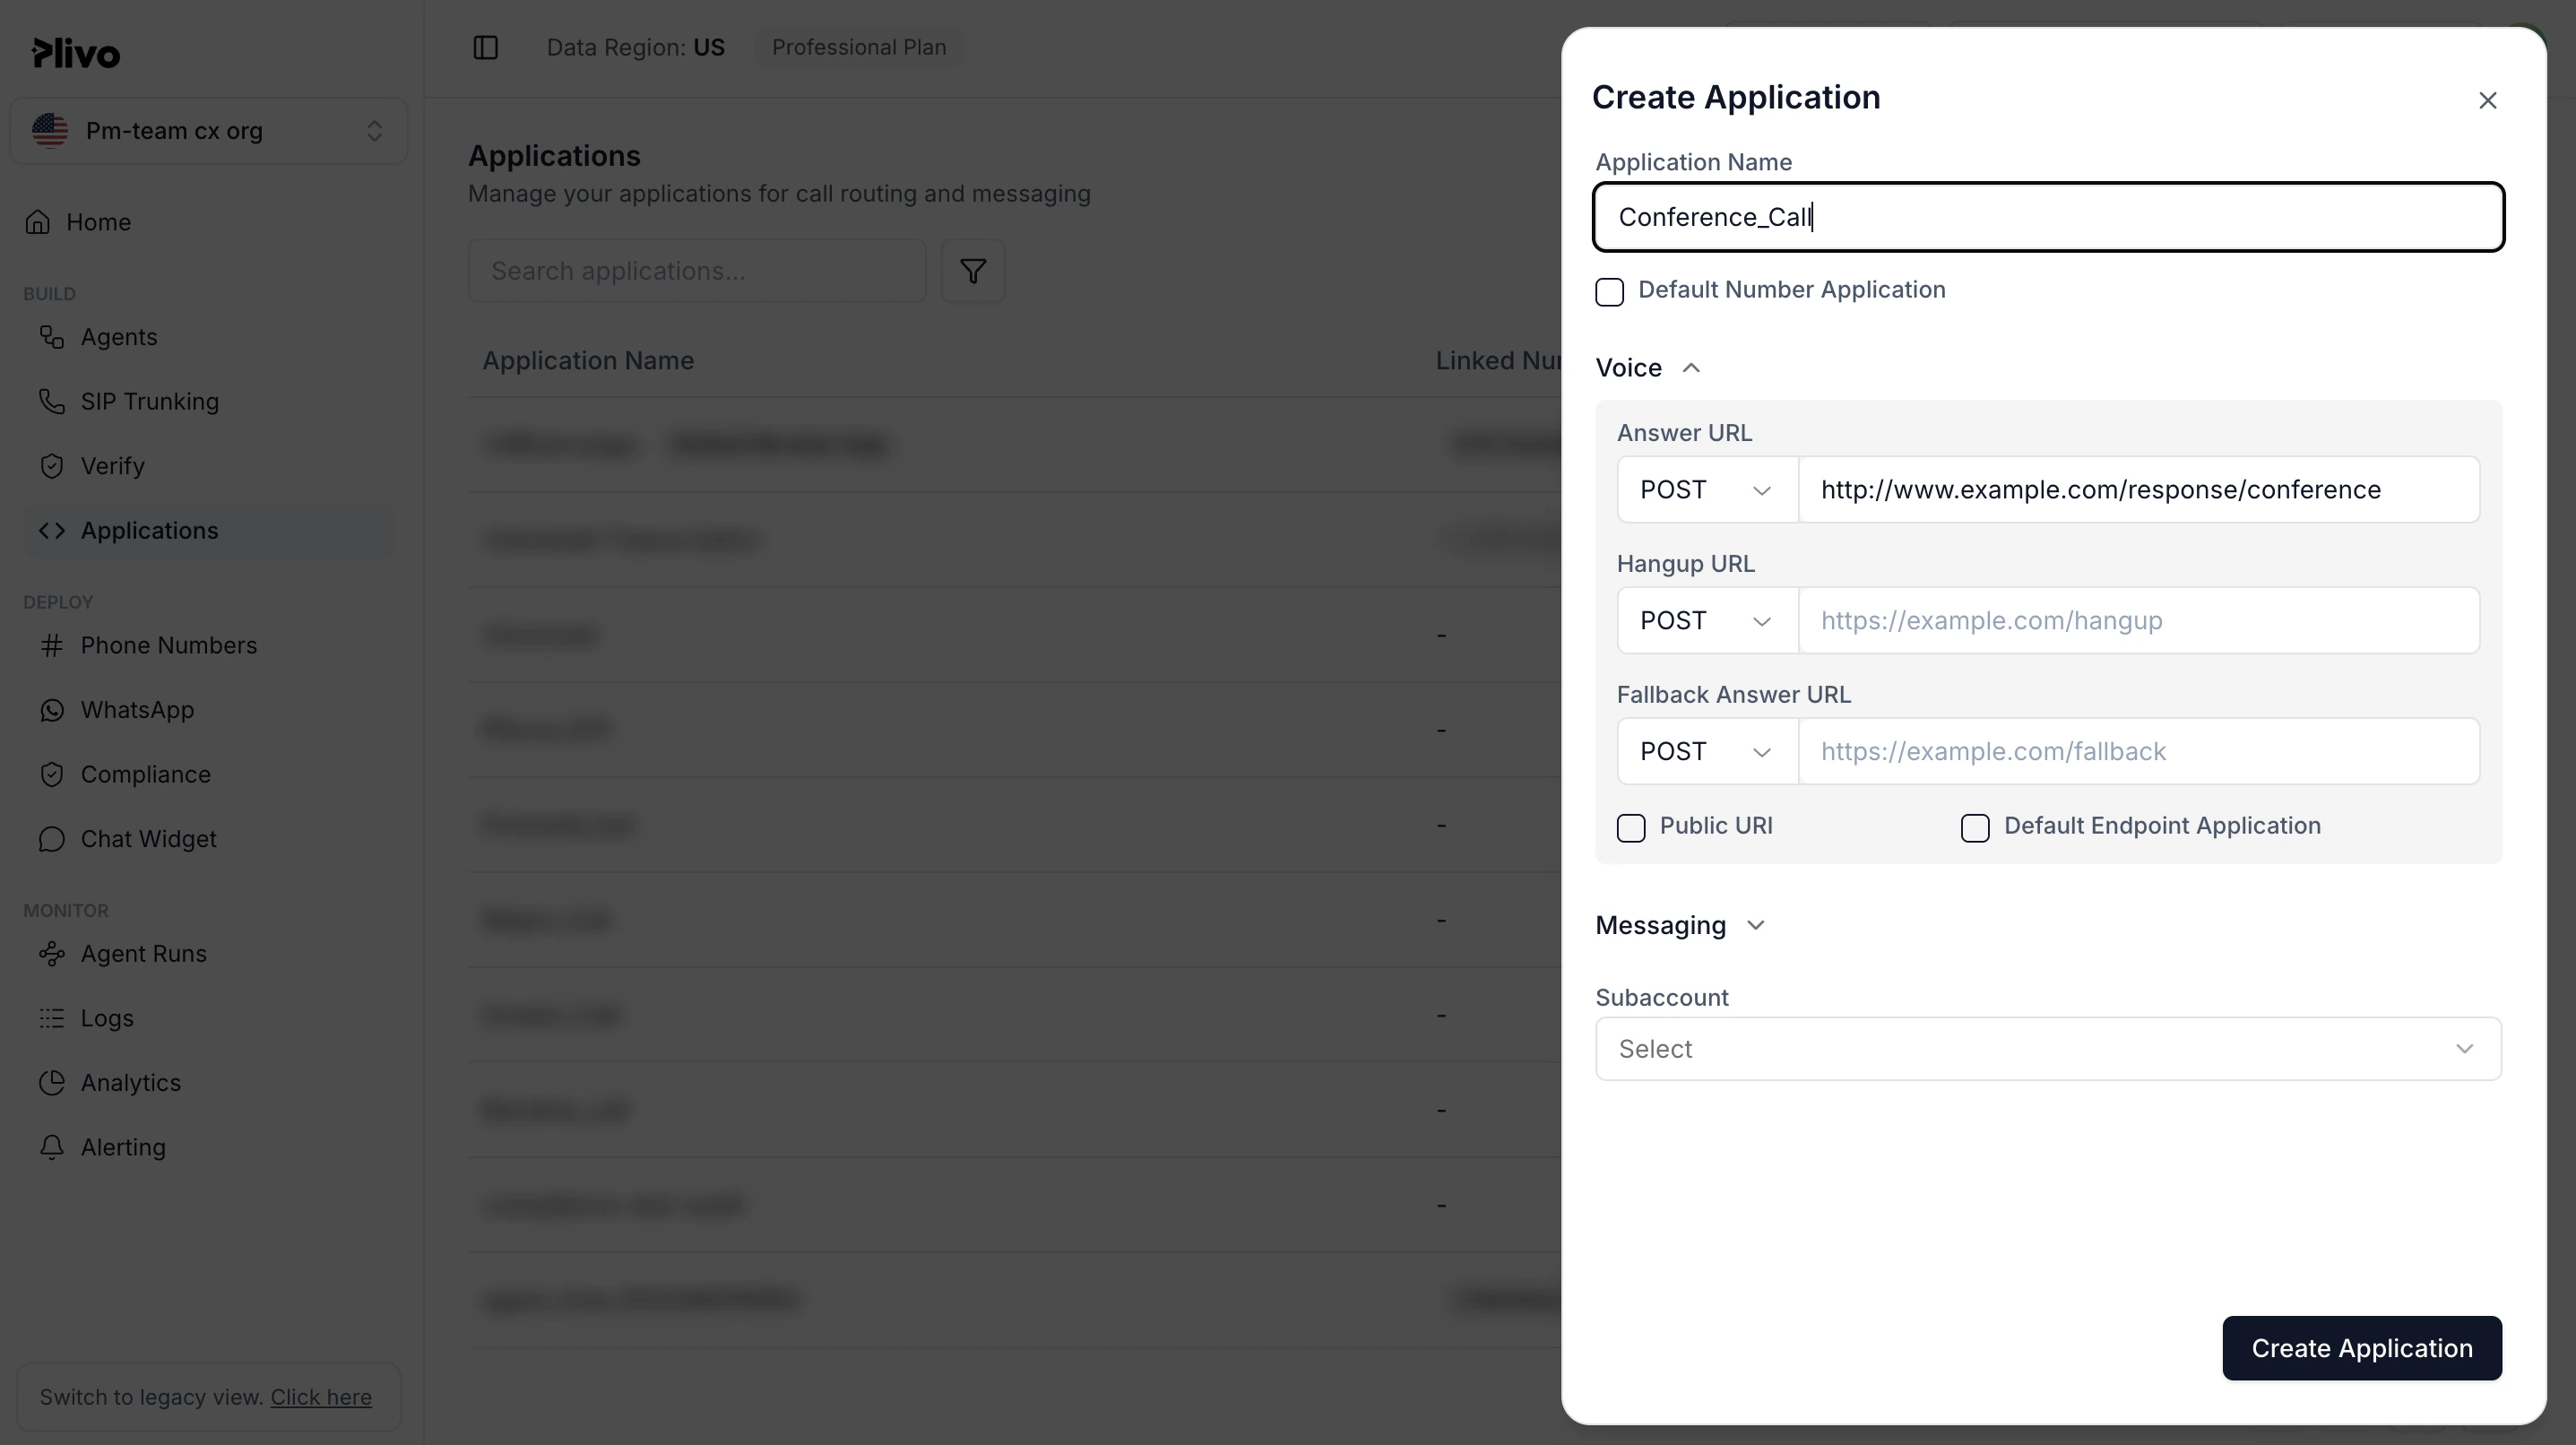
Associate the .NET application you created with Plivo by creating a Plivo application. Visit Voice > Applications in the Plivo console and click on Add New Application, or use Plivo’s Application API.Give your application a name — we called ours Conference Call. Enter the server URL you want to use (for example https://<yourdomain>.com/conference/) in the Answer URL field and set the method to POST. Click Create Application to save your application.

Assign a Plivo number to your application

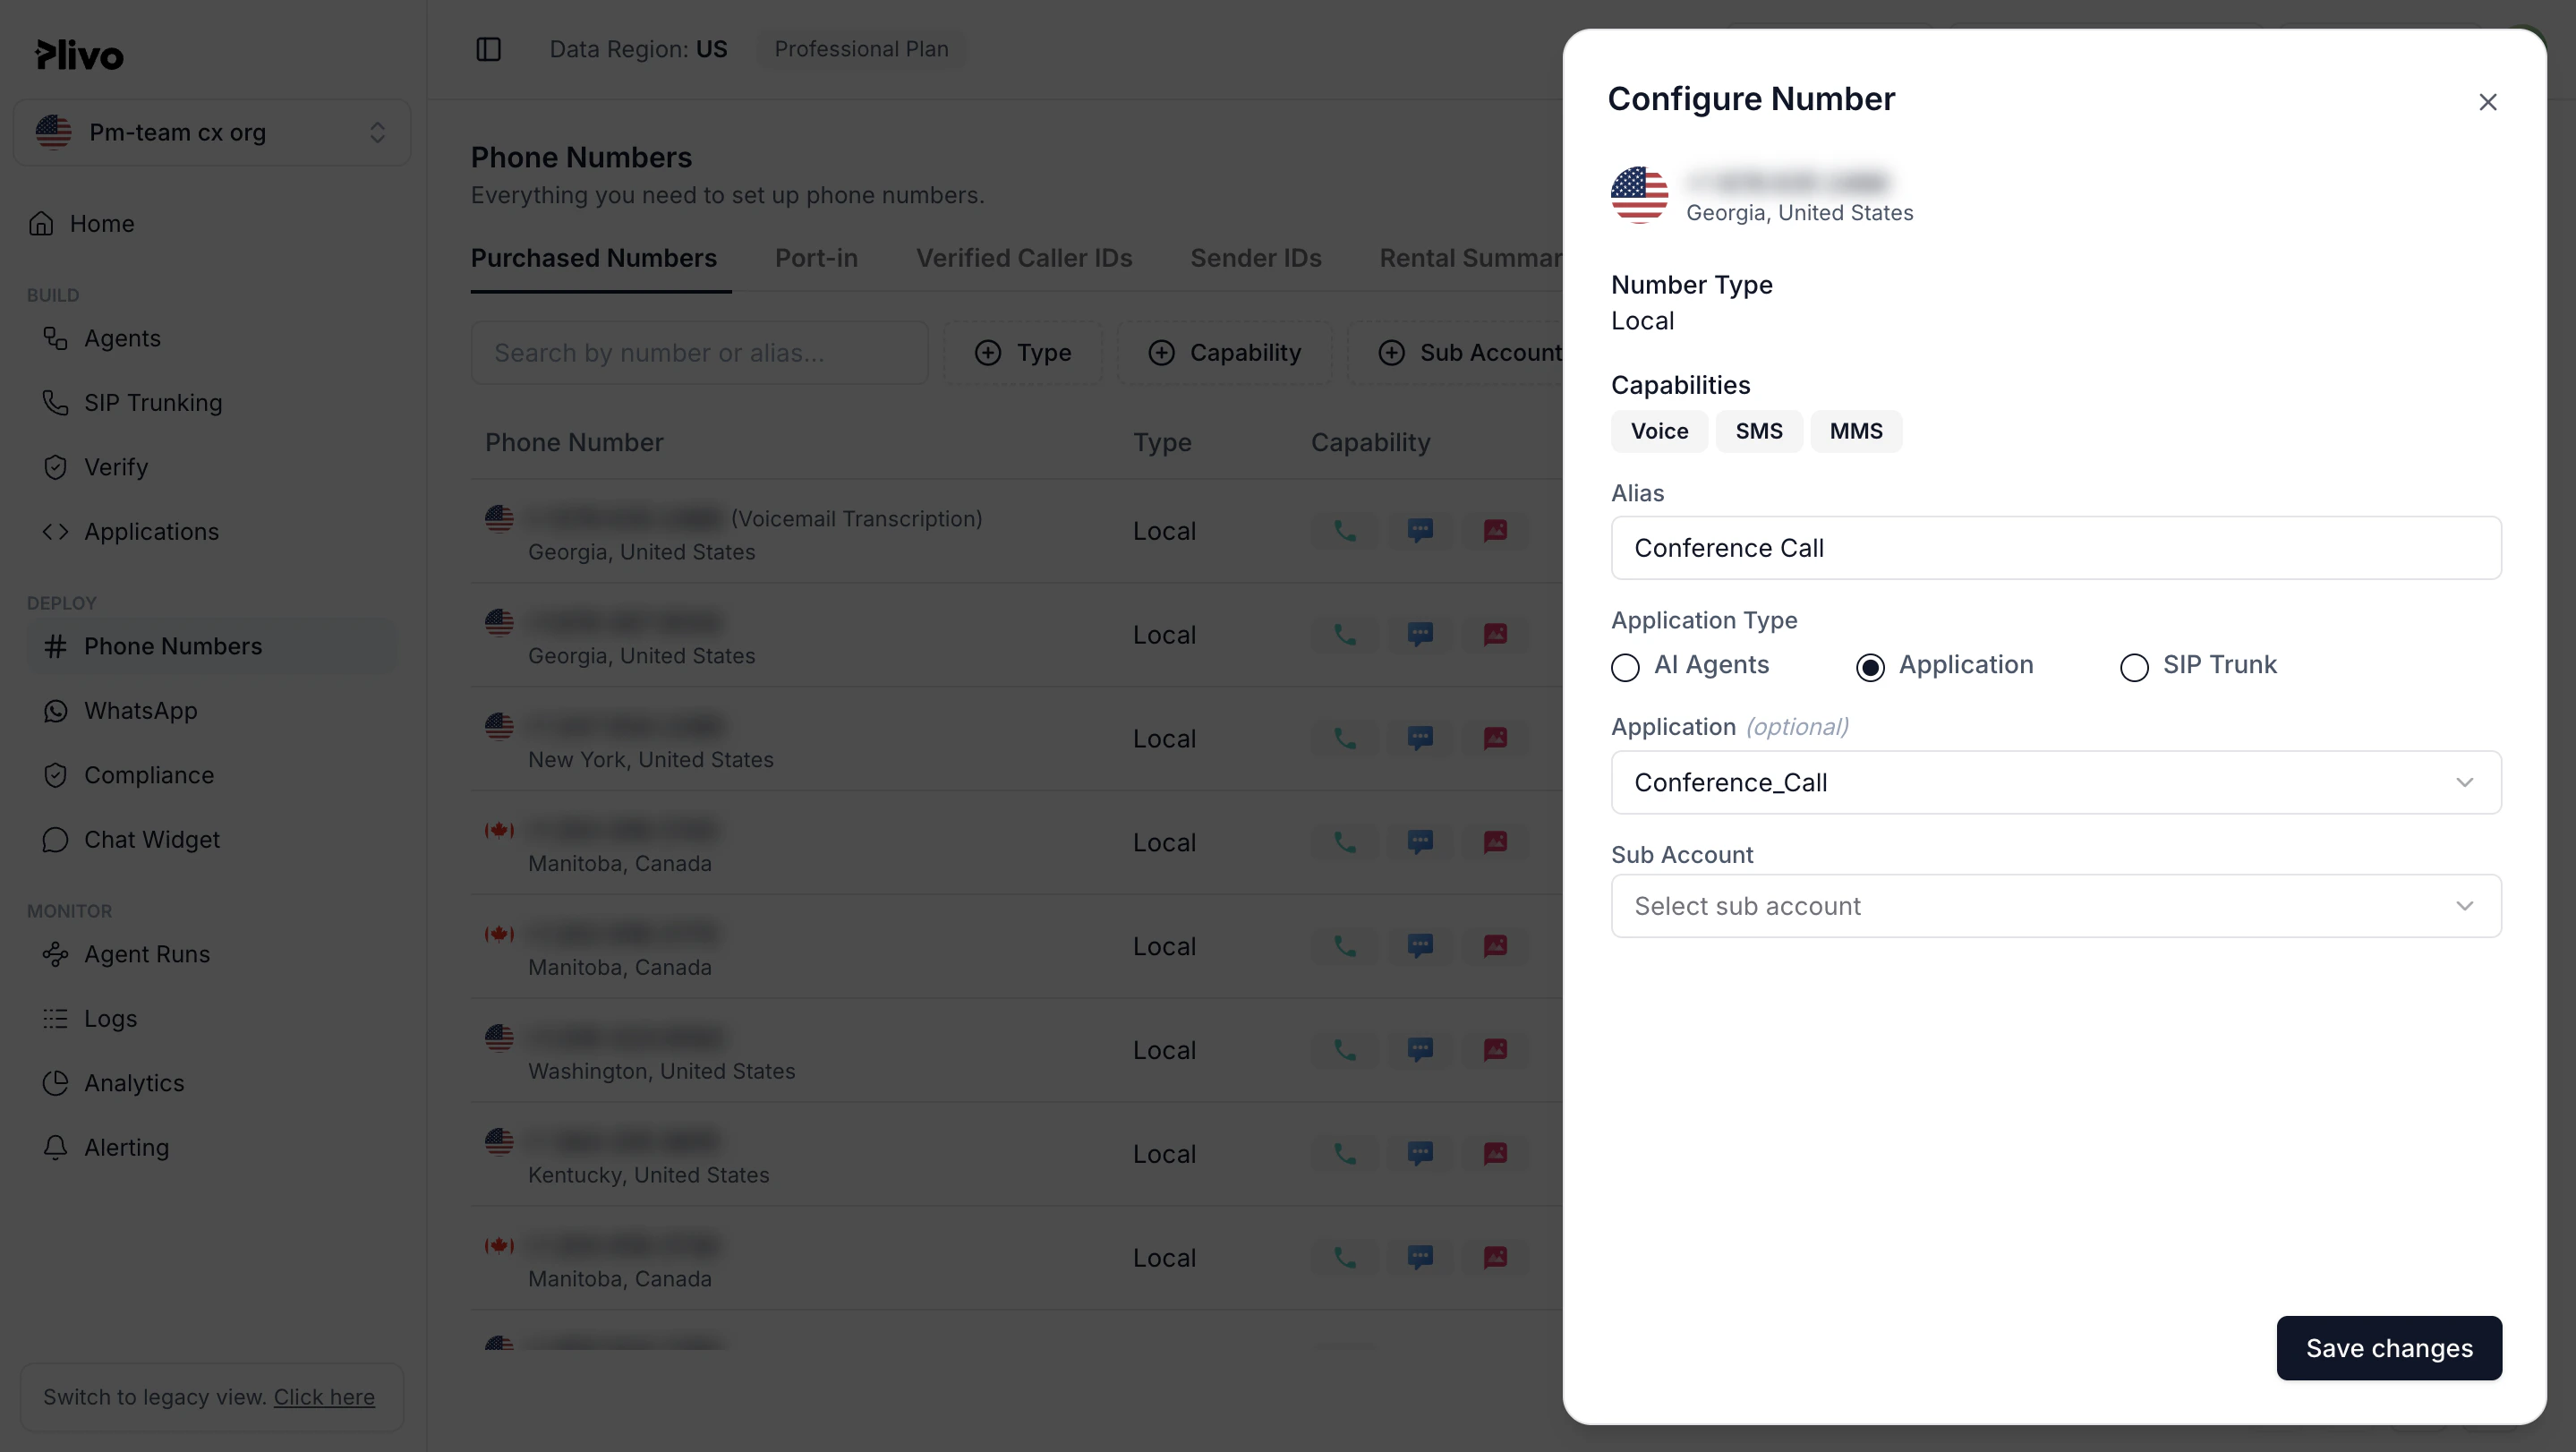
Navigate to the Numbers page and select the phone number you want to use for this application.From the Application Type drop-down, select XML Application.From the Plivo Application drop-down, select Conference Call (the name we gave the application).Click Update Number to save.

Test

Make a call to your Plivo number. You should be prompted for a PIN, then placed into a conference after PIN validation.