Receive Media Messages
Overview
This guide covers how to receive WhatsApp media messages when a user sends it to your registered phone number.
Prerequisites
To get started, you need a Plivo account — sign up with your work email address if you don’t have one already. If this is your first time using Plivo APIs, follow our instructions to set up a .NET development environment.
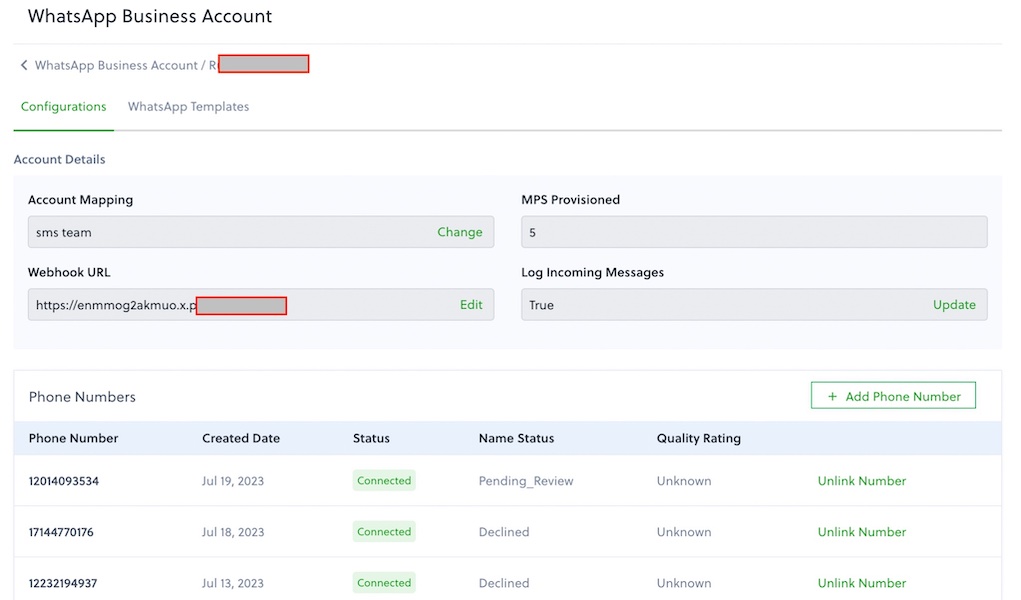
You must have an onboarded WhatsApp account to receive inbound messages. If a number is listed as connected, it can receive inbound messages.
Create an MVC controller to receive messages.
In Visual Studio, create a new project. Use the template for Web Application (Model-View-Controller).
Give the project a name — such as ReceiveWhatsapp. Navigate to the controllers directory in the ReceiveWhatsapp project. Create a controller named ReceiveWhatsappController.cs and paste this code.
using System;
using Microsoft.AspNetCore.Mvc;

namespace ReceiceWhatsapp.Controllers
{
    public class ReceiveWhatsappController : Controller
    {
        // GET: /<controller>/
        public String Index()
        {
            String from_number = Request.Form["From"];
            String to_number = Request.Form["To"];
            String text = Request.Form["Body"];
            String media = Request.Form["Media0"];
            Console.WriteLine("Message received - From: {0}, To: {1}, Media Attachment: {2}", from_number, to_number, media);

            if (text != null)
            {
                Console.WriteLine("Text: {0}", text);
            }

            return "Message received";
        }
    }
}
Configure a webhook URL in your WhatsApp Business Account
Add or update a webhook URL from this link to a WhatsApp Business Account. Once you’ve done this, you should be able to receive inbound messages.

Test
Send a WhatsApp message to the Plivo number you specified using WhatsApp application.
