Features of Powerpack
- Number Pooling: Powerpack intelligently distributes your outbound message traffic over a pool of source numbers to optimize your overall message volumes.
- Sticky Sender: Sticky Sender helps maintain a single thread of conversation by sending messages to a subscriber from the same source number in the pool.
- Local Connect: Local Connect helps prioritize phone numbers in the pool that belong to the region and/or area code of the subscriber.
- Number Pool Refresh: Powerpack keeps your pool of numbers healthy by automatically replacing phone numbers that have a poor delivery rate.
- Auto Traffic Distribution: Powerpack evenly distributes your outbound message traffic across the available phone numbers in your number pool.
- Source Number Queuing: A dedicated rate-limiting queue per source number ensures that you never exceed the per-number message sending rates applicable in the US and Canada.
Introduction to Powerpack

Product features
- Number pool — Powerpack intelligently distributes your outbound message traffic over a pool of source numbers optimal for your overall message volumes. It takes only a few seconds to set up a pool of source numbers that’s just right for your message volume.
- High deliverability — Powerpack provides high deliverability by intelligently managing your numbers. Powerpack provides intelligent load management and eliminates any single point failure.
- Regulatory compliance — Messaging regulatory compliance varies not only by number type but often by location. Powerpack builds in a consolidated set of compliance controls that enhance deliverability and throughput.
- Sticky Sender — If you wish to contact the same subscriber more than once, Powerpack can help maintain a single conversation thread by always sending messages to the subscriber from the same source number in the pool.
- Local Connect — Continuing to personalize your message communication, Local Connect prioritizes phone numbers in the pool that match the region and/or area code of the subscriber.
- Automatic fallback — You can enable automatic fallback by adding Plivo toll-free or short code numbers to your Powerpacks. Toll-free and short code numbers are better options than long codes for application-to-person (A2P) messages sent at high scale. Powerpack can switch from one number type to another without any delivery loss.
Creating a new Powerpack
To create a new Powerpack:-
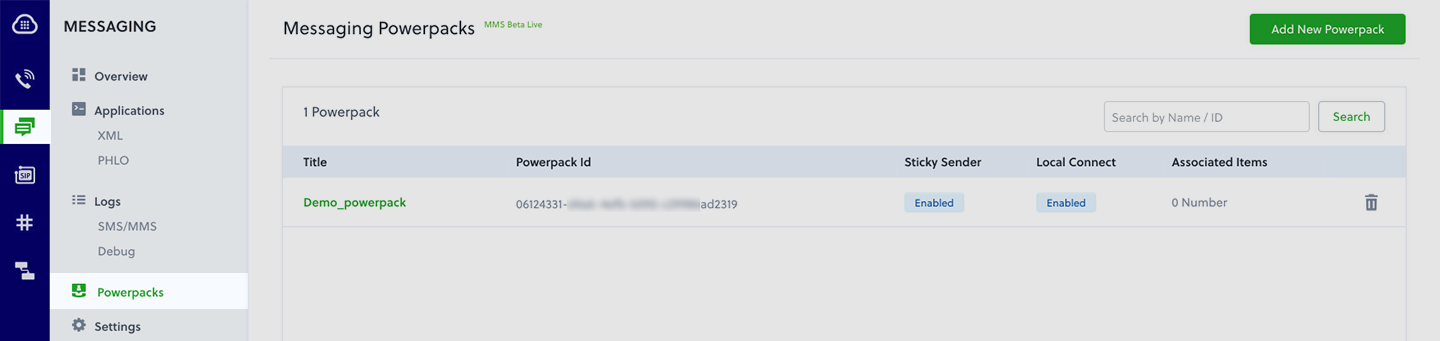
Log in to the Plivo console and navigate to Messaging > Powerpacks, then click Add New Powerpack.
-
In the Details section, enter a name for the Powerpack.
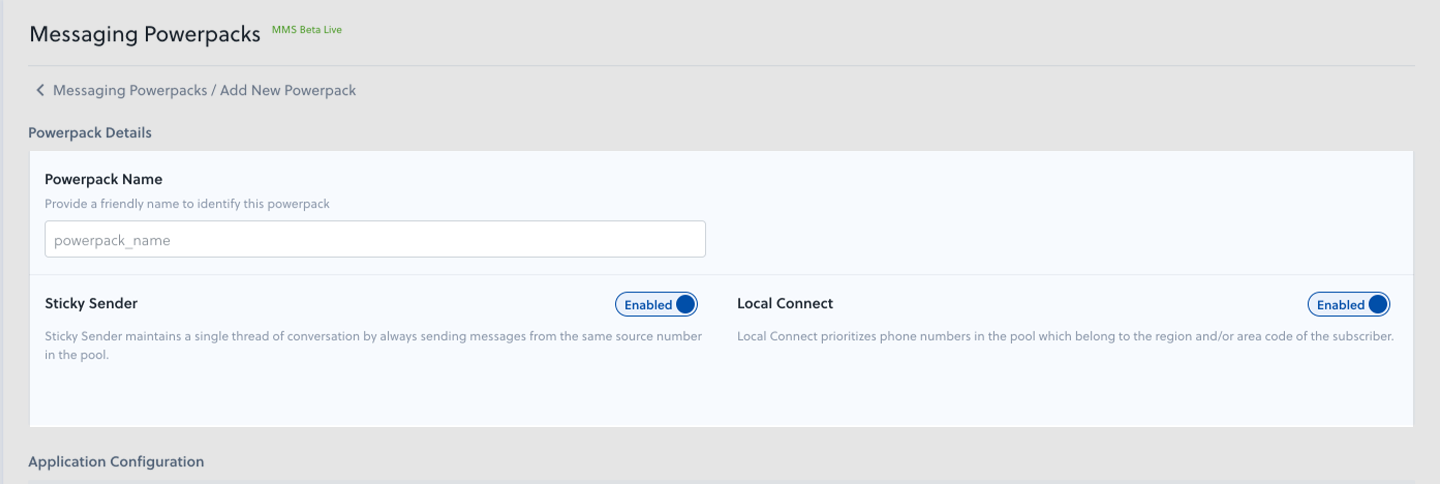
- Enable Sticky Sender if you want to maintain a single thread of conversation by ensuring that messages sent to a particular number are always sent from the same Powerpack source number. Enabling or disabling Sticky Sender is reflected in the source number resolution logic instantaneously.
- Enable Local Connect if you want to ensure that Powerpack prioritizes using a source number belonging to the same region or area code as the destination number for outbound SMS and MMS messages. Enabling or disabling Local Connect is reflected in the source number resolution logic instantaneously.
- Under the Application Configuration settings, select the application type and name from the respective drop-downs.
-
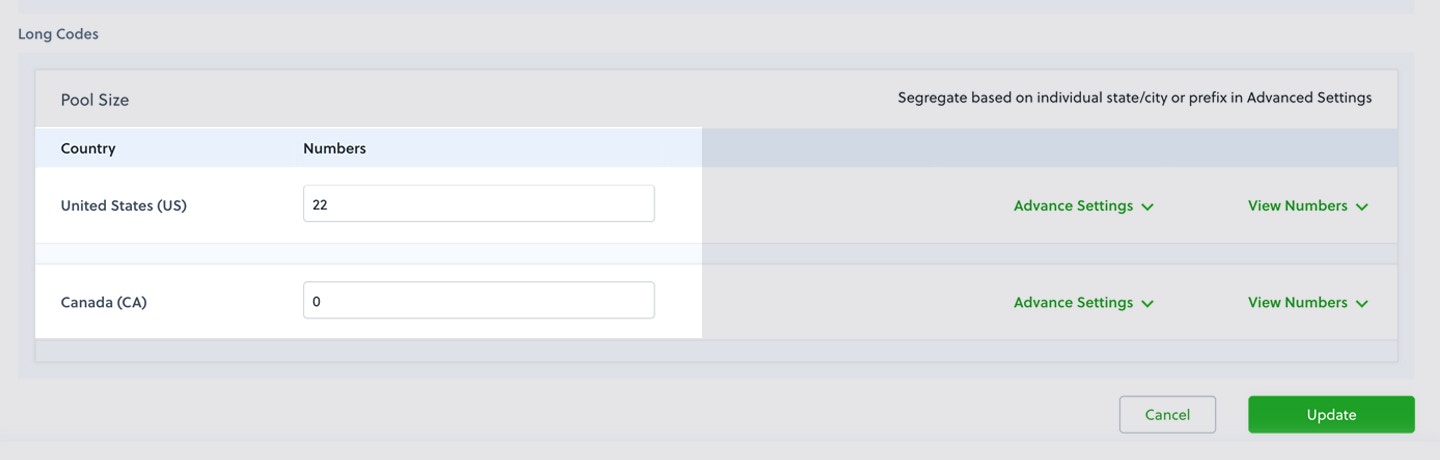
Under Long Codes, in the Number Pool section, enter the count of phone numbers at a country and/or regional level.
- To configure your number pool at a country level, enter your daily message volume for the US and Canada. Plivo will recommend the optimal phone number pool size based on your input.
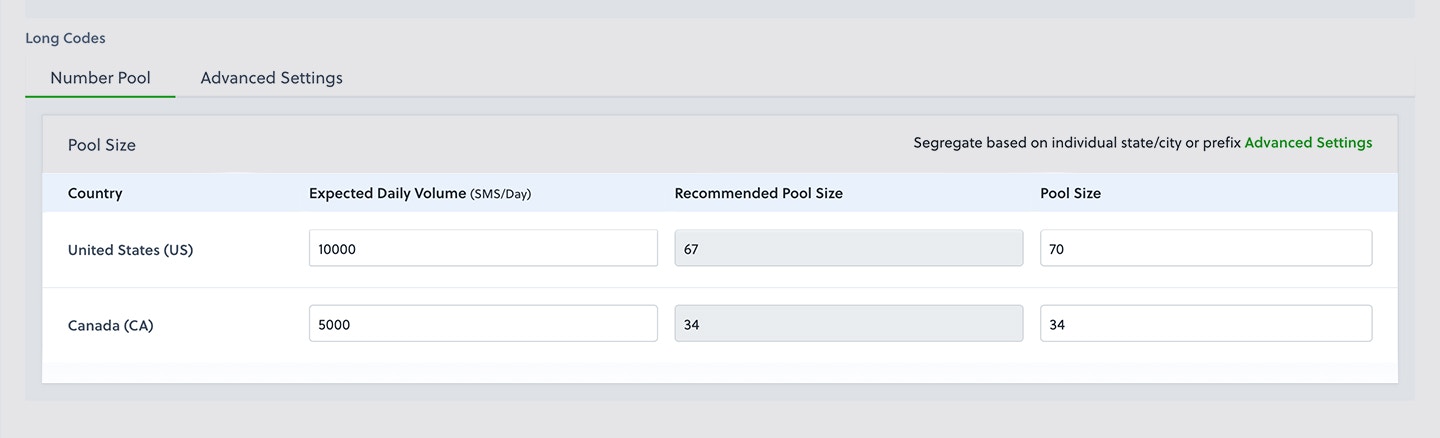
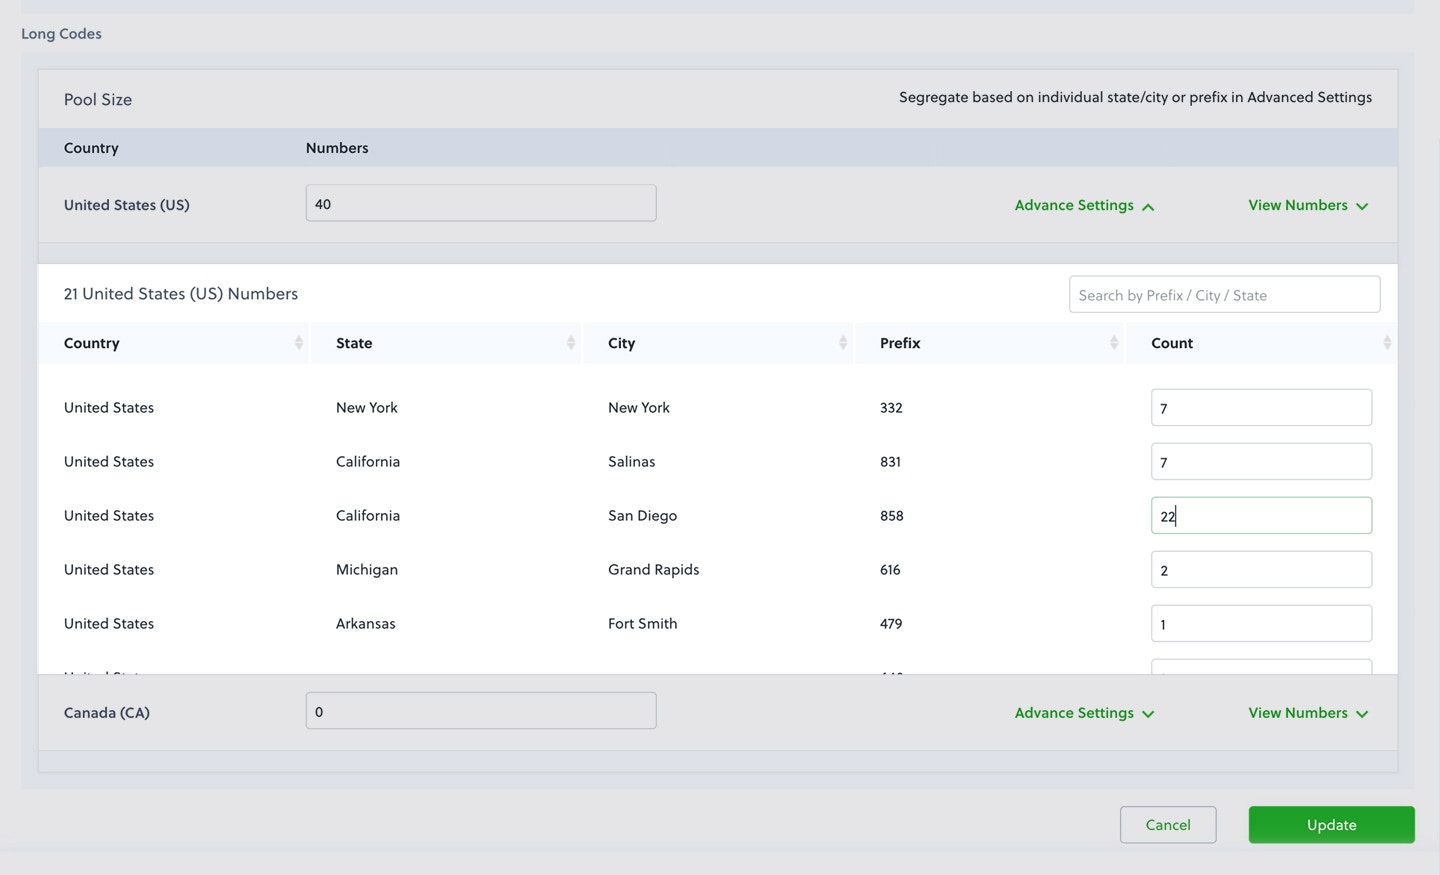
- To configure your number pool at an area code or region level, use the Advanced Settings tab to add phone numbers to the number pool at a more granular level.

- If you don’t need to get more granular than state-level region matching, simply specify the total count of numbers against any prefix from that state.
- Specify the pool size, and click Add Powerpack to initiate the purchasing and provisioning of phone numbers.
Sending outbound messages
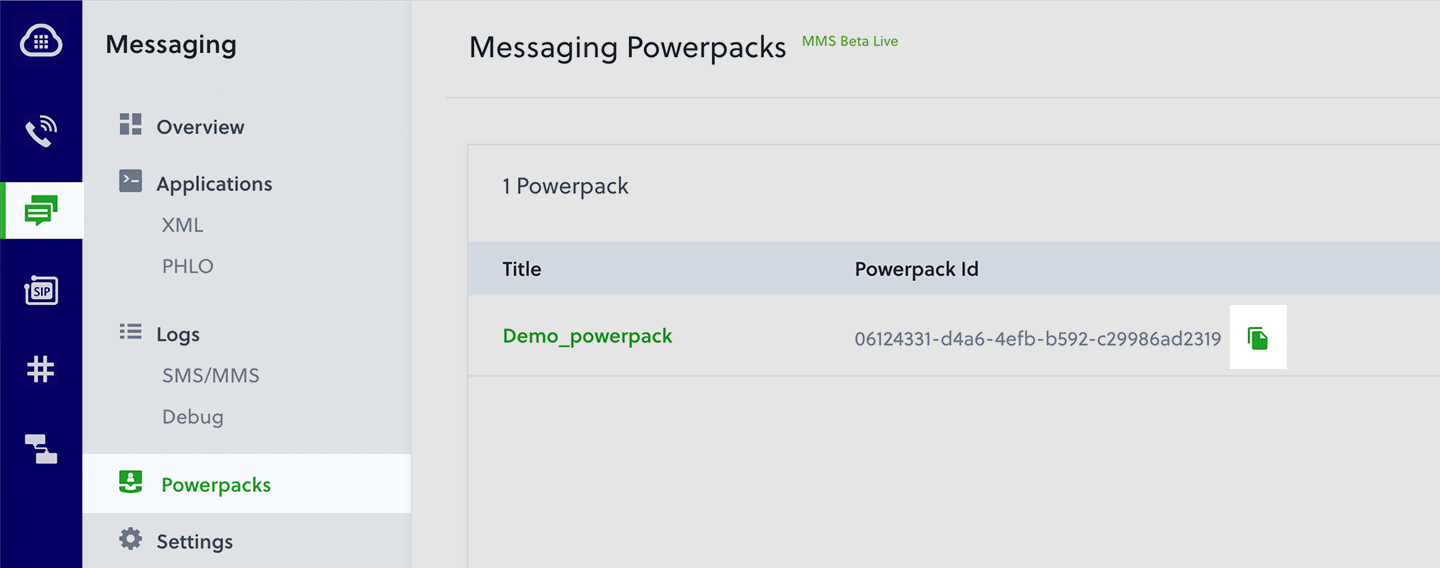
To send messages using Powerpack:- Log in to the Plivo console and navigate to Messaging > Powerpacks to view all of your Powerpacks.
-
Copy the Powerpack ID for the Powerpack you wish to use.
- Enter the Powerpack ID for powerpack_uuid in the Send SMS API request.
Code samples
Updating a Powerpack
To modify or update your Powerpack- Log in to the Plivo console and navigate to Messaging > Powerpacks to view all of your Powerpacks.
- Select the Powerpack you wish to modify or update.
- In the Properties section, modify Sticky Sender by enabling or disabling it, then click Update.
- In the Properties section, modify Local Connect by enabling or disabling it, then click Update.
-
To manually remove phone numbers from your number pool, first click on View Numbers.
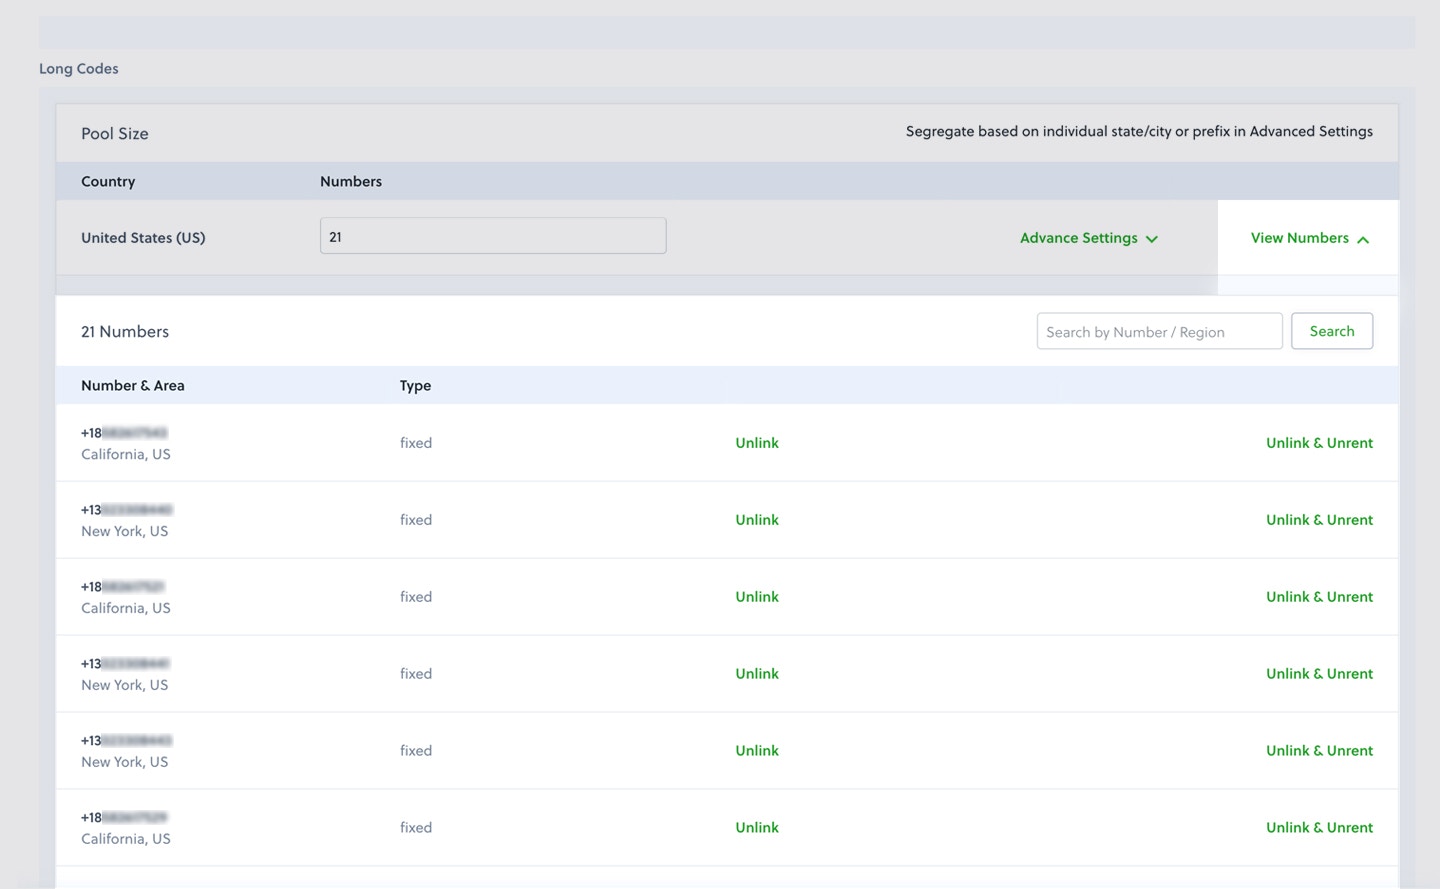
- Select Delete & Unrent for the numbers you wish to remove from your number pool.
Receiving incoming messages
Plivo Applications can handle all incoming messages to the Powerpack phone numbers. To create a new Plivo Application, navigate to Messaging > Applications on the console and click Add New Application. Once created, you can associate this application with your Powerpack. Once you configure an Application for your Powerpack, all incoming messages to your Powerpack phone numbers are posted to the message_url in your Plivo Application.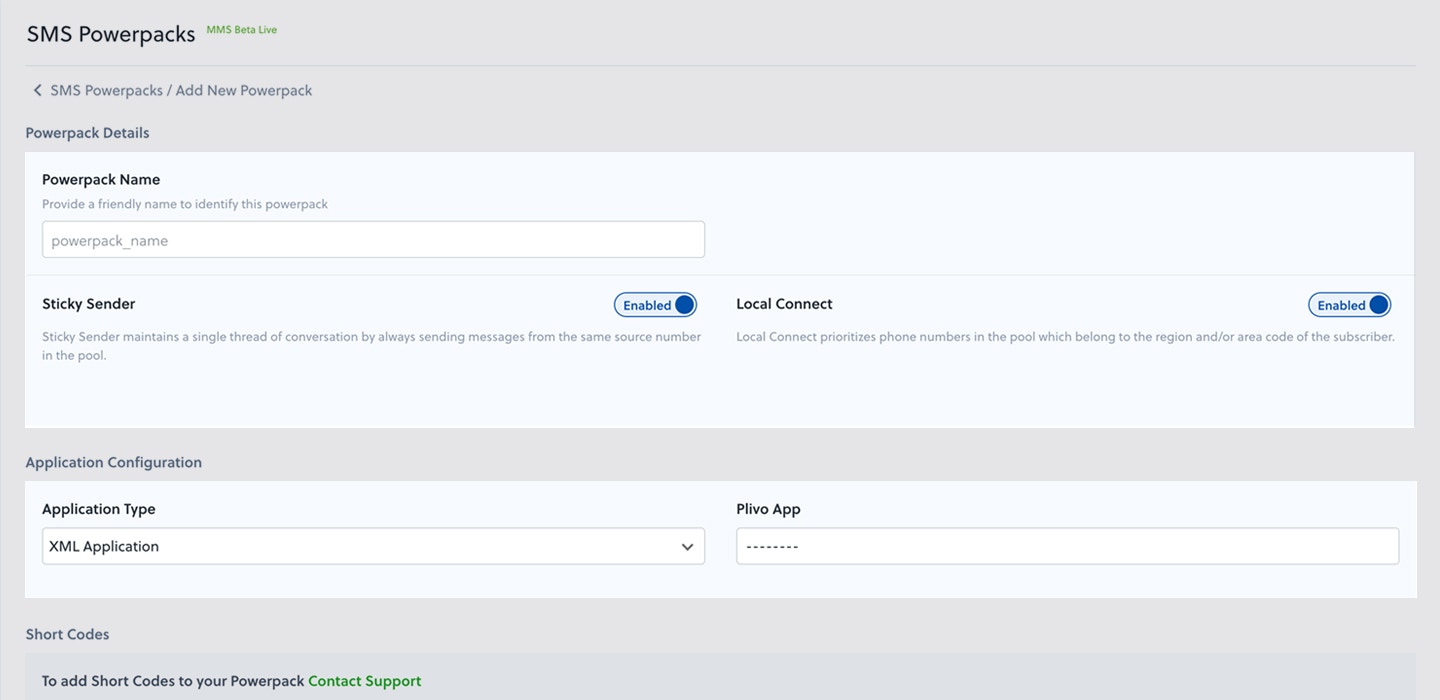
- In the application settings, modify the application by selecting the type and name from the respective drop-downs.
-
The Number Pool Composition section displays the total count of phone numbers in the number pool for each country.
- To update your number pool composition at a country level, update the number count for the country and click Update.
- To update your number pool composition at an area code or region level, go to the Advanced Settings tab, update the number count for the region or area code, and click Update.
- If you are increasing the pool size, a dialogue box will prompt you to confirm the purchase of new numbers.
Local Connect
Local Connect is designed to make message communication personal. It ensures that messages get sent using a local phone number with the same area code or regional prefix as the destination number.How Region-Based Source Number Resolution Works in Local Connect
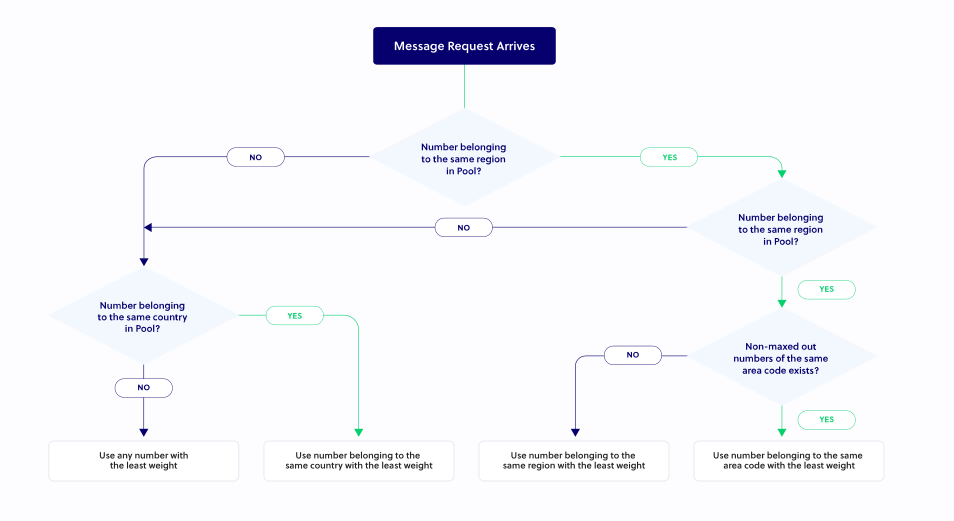
- If a phone number with prefix 415 is present in the number pool, Powerpack will use it to send the outbound SMS/MMS.
- If a phone number with a 415 prefix is not found in the number pool, or if all the phone numbers with 415 prefixes in the pool have already been used to recommended capacity (150 messages/day), Powerpack will deliver the message through any other phone number of the same region as the destination number (in this case, California).
- If no phone numbers of the same region are found in the Powerpack, the message will be sent via a random US phone number.
- If no US phone numbers are found in the pool, the message will be sent via a Canadian number.
How to specify automatic fallback for SMS and MMS in Powerpack
You can add short code, toll-free, and long code numbers to your Powerpack. When you add more than one type of number to a Powerpack, the Powerpack automatically resolves the source numbers of various types based on the number available and priorities set within the Powerpack to help you achieve the best delivery rate. The default fallback priority list, which you can customize in the console, is:| United States | Canada |
|---|---|
| Short code — Priority 1 | Short code — Priority 1 |
| Toll-free — Priority 2 | Long code — Priority 2 |
| Long code — Priority 3 | Toll-free — Priority 3 |
| United States | Canada |
|---|---|
| Short code — Priority 1 | Short code — Priority 1 |
| Long code — Priority 2 | Long code — Priority 2 |
| Toll-free — Priority 3 | Toll-free — Priority 3 |
Operator configurations for SMS and MMS
Operator configurations allow you to select the type of source number, such as short code or toll-free, with which to send a message to specific operator terminating numbers. They are currently available only for Verizon and AT&T operators. In the example below, all Verizon terminating numbers are set to be routed via short code.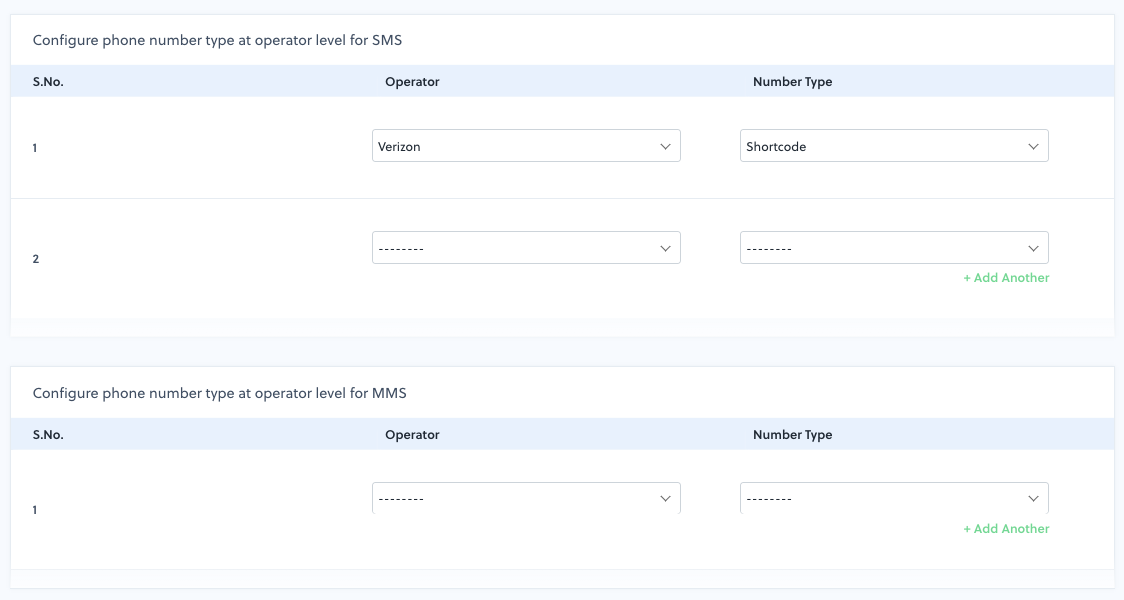
Add a toll-free number to a Powerpack
Combining toll-free numbers in the Powerpack helps in two major ways.- Run multiregion message business campaigns: Toll-free numbers support delivery at a larger scale. Combining this scaling capability with Powerpack gives you increased availability and high-scale deliverability.
- Reach networks not supported by your toll-free numbers: Even though toll-free numbers can reach most destination networks, there might be some networks that don’t support them. In these instances, Powerpack intelligently falls back to using other numbers in the pool.
To use toll-free numbers with Powerpack:
- To add a toll-free number to your Powerpack, go to the Powerpack page in the console and add a toll-free number.
- You may add only one toll-free number to a Powerpack.
- Once you’ve added a toll-free number to your Powerpack, Plivo will use that number to send an outbound message if the destination network and country support toll-free messaging. Otherwise, Powerpack will fall back to using other numbers in the number pool.